

I LOVE those glamorous camper vans spotted all over Instagram and YouTube. They’re beautifully designed, cleverly and intricately built, and just SO COOL. You’ve seen them, everyone’s seen them. The COVID pandemic brought “van life” to so many people’s minds as work became remote (I’d like to work remotely from a national park/beach/mountain, too) and droves of people flocked to the outdoors. I grew up camping with my family in a towable pop-up camper and have been on a few tent-camping, car-camping, and backpacking adventures, but I’ve always loved RV’s. My goal as an elementary school-aged kid was to retire in an RV at Beaver’s Bend State Park. I know— I was a cool kid.
After our wondrous time aboard an Alaskan cruise, the next leg of our Summer 2022 adventure was here and I was about to realize my dream of (temporary) van life! But it was not to be glamorous. As you’ll see, it was very… different… from what you see on social media. We wouldn’t be owning this van and we were far away from home so anything we used to outfit the van would have to be temporary. Our plan was to live in the van for nearly three weeks as we road-tripped from Seattle to Vancouver to Banff National Park to Jasper National park to Olympic National Park, before returning to Seattle.


How To “Van-Life” Your Road Trip
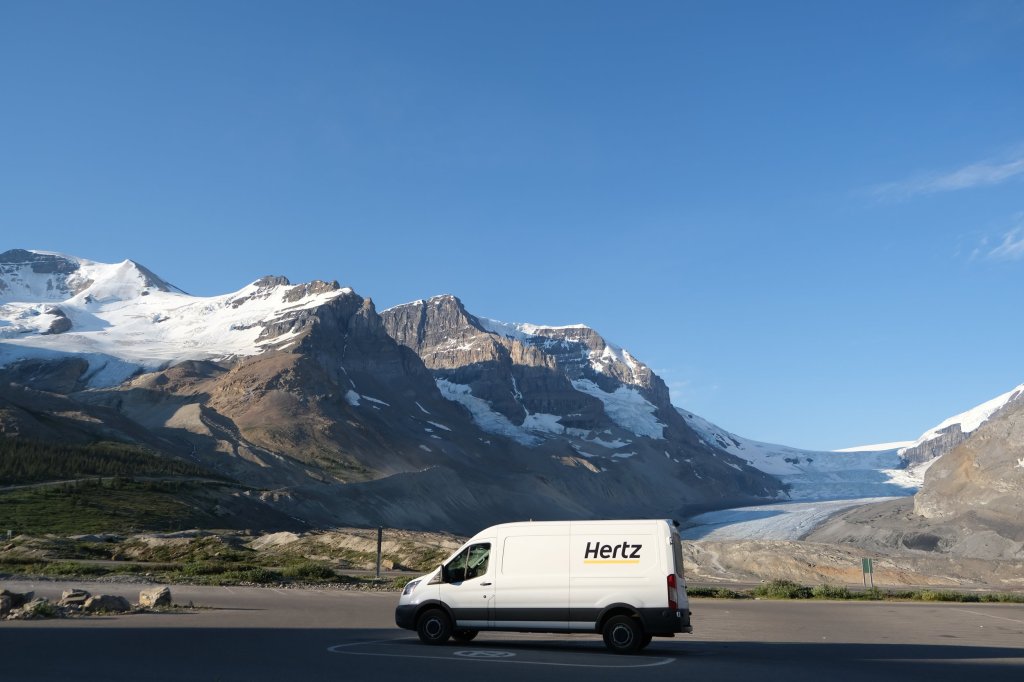
Options for living your best van-life on a trip obviously include renting a camper van that is already outfitted and has been elevated from “van” to “camper van” status for you. However, the cost of renting a full-fledged camper van for 3 weeks straight was astronomical. Alternative? Build your own! Our solution was to rent a cargo van from Hertz Rent-A-Car, fit it with a bed and other necessities, and just hit the road. It sounds crazy, but it was so fun! Here’s how we did it:
The Van


First we took public transportation from the Seattle-Tacoma International Airport to Hertz Car Rental. The Hertz location that offered cargo vans (the big ones without passenger seats in the back) was a bit further out than the central Seattle locations.
Pro tip: make sure you get a cargo van so you actually have space to live in the back. A high-roof van will allow for upright standing room inside. Call the rental company ahead of time to confirm they have high-roof vans if you’d like to stand up indoors.
Upon arrival, we were introduced to our cargo van home for the next few weeks, a Ford Transit 250 high-roof, whom I quickly and affectionately named Henry. Henry the Hertz.
Since we rented our van from a car rental company, we didn’t have much say in the make and model of our van. The rental was confirmed to be a high-roof cargo-style van, and before pickup we were told it was “likely going to be” either a Dodge Ram ProMaster or a Ford Transit 250. If you have more say in the matter and would like more information on the various vehicle choices for camper van bones, check out this resource comparing options from Ford, Dodge, Mercedes, and Nissan.
The Bed
Our first stops in the van were to Walmart and IKEA to purchase a bed and other furnishings. IKEA beds are prettier, but Walmart beds ended up being cheaper. As anything we purchased to outfit our van was going to be donated after our 3 weeks of living in Henry, we opted for the affordable choice. Make sure to search online beforehand so you know which Walmart location has a bed in stock before you drive there!
We purchased a twin bunk bed from Walmart for around $110. A twin size bed fit easily into the van’s cargo space and left room to move around. We unboxed and assembled the bunk bed in the Walmart parking lot, much to the amusement of the parking lot security guard who circled us about 23 times. Choosing to snuggle (read: squish) together with both of us on the top bunk left lots of storage space underneath for our luggage and other belongings.
One of the biggest mistakes we made during this van build was trying to save some money on the mattress. We initially opted for an air mattress but it only took one sleepless and absolutely freezing night to convince us to bite the bullet and purchase a proper mattress. A foam or spring mattress will actually insulate your body heat rather than suspending and surrounding you with freezing air like an air mattress will. We were already sleeping in an un-insulated metal box outdoors in the mountains— quality of sleep was worth the investment.
Additionally, don’t underestimate the climate of mountainous areas! I regret not buying big blankets when we had the chance to in the big cities of Seattle and Vancouver before setting out to the national parks. The parks get surprisingly chilly overnight and we went blanket shopping several times within the national parks.
Privacy
Behind the driver and passenger seats, our van had no side windows in the cargo space. However, it did have two large windows in the vehicle’s back doors. These needed to be covered up for both privacy and climate control. This need was satisfied by a set of blackout curtains hung from adjustable length curtain rods to cover the rear windows. The Ford Transit cargo van had lots of anchoring holes already built in to the van side walls, and the curtain rods fit perfectly into two of these holes. A second set of blackout curtains was used to separate the front driving space from the back living space.
Lighting
For the sake of reliability, we didn’t want to rely on solar-powered or plugged-in devices. We used a variety of battery powered lights and used magnets or command strips to fix them to the walls and ceilings. Magnetic lights are extra useful as you can easily detach them and use them as flashlights as necessary!
Storage
IKEA plastic bins and boxes fit underneath the bed into little nooks and crannies inside the van. Pro tip: get more boxes and bins than you think you need because there are always more little things that need secure storage in a moving van! Our boxes were organized into categories: outdoors stuff (bug spray, sunscreen, cold weather gear, extra lights), kitchen stuff (dishes and cookware), and toiletries. We also stopped by Oomomo (a super cute Japanese lifestyle store reminiscent of Daiso but larger) and bought a wire rack from which we suspended hanging baskets using lots of S-hooks to maximize vertical storage. Things to consider: you want easy access to high yield items like sunscreen and bug spray, a place to put your phone while sleeping, and a place to hang your jacket so not everything is on the floor.
The Van Kitchen


We created a pantry from a lightweight plastic IKEA shelf and zip-tied it in place to the aforementioned very conveniently placed tie-up holes in the van walls. The pantry was filled with a limited amount of what we deemed were necessities: salt, pepper, lemon pepper, soy sauce, sesame oil, and cooking oil. We brought a frying pan and small pot from home, and purchased a larger stock pot there. Various food ingredients also stocked the pantry- canned veggies (we didn’t have a powered fridge), Asian noodles and spaghetti, spaghetti sauce, dehydrated miso powder, dehydrated seaweed, canned salmon purchased from Ketchikan during our Alaska trip.
Both indoor and outdoor eating were made possible with the purchase of a small folding table and two collapsible camping chairs.
A small butane-powered camp stove with extra butane, a 60 quart ice cooler “fridge”, a “kitchen sink” bin for washing dishes rounded out the van’s kitchen. Another bin held our eating supplies including plates, bowls, knives, forks, spoons, chopsticks, tongs, can opener, bottle opener, ladle, and grill brush.
Don’t forget the other handy necessities- paper towels, kitchen towels/rags, aluminum foil (great for baking/grilling things over campfires), hand soap, and (biodegradable) dish soap.
Pictured are some of the meals we prepared (usually using both the van kitchen and a campfire if available at the campsite we stayed in that night)!


Water

No messing around with water pumps, grey water, and black water tanks for us. For this minimalistic, no-build van-build, we chose a single 7-gallon water tank with a spigot faucet. It was affordable and held more than enough potable water for two adults, with the plan to refill daily. Every campsite had a station to fill your water reservoir with potable water. This tank held enough to refill our water bottles, cook meals, wash dishes, and supply water for our showers (see below). Make sure to get a tank with a spigot as it provides you with running water!
Bathroom/Shower
We did not have a camp toilet in the van and I don’t think it’s worth the cost for a short-term trip. Most of the national parks in our itinerary mandated camping in designated campgrounds, so we planned on camping in facilities with pit toilets at the very least. I do recommend purchasing toilet paper just in case.
Campgrounds with hot showers were less guaranteed so we purchased (ahead of time, online) and packed a camp shower that uses a battery powered pump (here is a representative product) to create (actually quite wonderful) water pressure without the need to elevate the water source. Other cheaper camp shower alternatives are essentially a heavy bag of water that needs to be hung from above to allow gravity to provide water flow, but these looked less than ideal. I would definitely go for the slight splurge and bring a shower pump. Even on nights without shower facilities, we still had hot outdoor showers! Use the butane stove to heat some water and mix it in a bucket with cool water to the desired temperature. Then just drop the shower pump into the bucket, turn the pump on, and you have a nice pressured hot shower! Just make sure you protect the shower pump’s battery pack from all water sprays.
No-Build Rental Camper Van Build Shopping List
- Lights (battery-powered, USB-rechargeable, flashlights, head lamps)
- Rope, carabiners, clips (for laundry and various use)
- Wire, zip ties, bungee cords (useful for anchoring things inside the van)
- Tension curtain rod, privacy curtains
- For vertical storage on walls: wire grid, S-hooks, hanging baskets, Command strips, strong magnets
- Wash bins (to hand-wash clothes and dishes)
- Consider foam padding or a rug to insulate the floor
- Small broom and dustpan to keep things clean
- Rechargeable fan for nighttime air flow
- Small folding table to eat at and for more indoor counter space, camp chairs
- Small camp stove, lighters, fire extinguisher
- A bed and mattress (elevation of the mattress is ideal as it allows for storage space underneath), bedding
- Battery powered shower pump, large water bucket, slatted mat to stand on when showering outdoors
- Lots of storage bins! Get some that fit under the bed frame, then get a few extra because you’ll always need them.


Leave a comment